
Scrap Mechanic Car Guide: Build Your First Survival Car
Build a reliable Scrap Mechanic car for Survival, learn the basic chassis, steering, engine, suspension, drill car, and piston car layouts, and fix common vehicle problems.
For a first Scrap Mechanic car, build a small four-wheel Survival vehicle before attempting a massive truck, a piston car, or a complicated Workshop design. A low, wide chassis with a driver seat, engine, steering bearings, and four matching wheels will carry loot, reach the Mechanic Station, and give you a reliable platform for later upgrades.
This Scrap Mechanic car guide explains the basic car build, the parts that actually matter, how to make a stable Survival car, and when to choose a drill car, piston car, or advanced suspension design. The goal is a vehicle that works repeatedly, not just a screenshot that looks impressive.
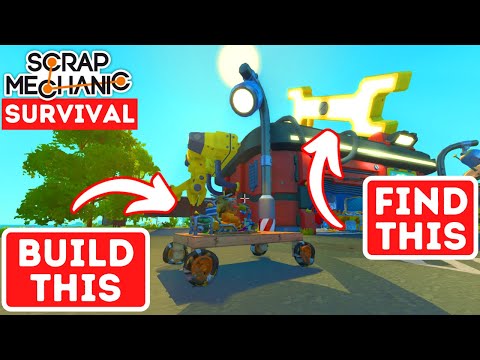
First-car build reference from a community Survival tutorial. Start with a working utility car, then add suspension, storage, or a drill one upgrade at a time.
Quick answer: how to build a basic Scrap Mechanic car
Place a Lift on flat ground, build a rectangular chassis, attach four wheels through bearings, mount a driver seat, add an engine, and connect the controls. Put the drive wheels on one axle and the steering bearings on the other. Test the car on the lift and in an open area before adding body panels or heavy cargo.
The minimum Scrap Mechanic car build is:
- A Lift for building and recovering the vehicle.
- A light, flat chassis with enough width for the wheels.
- Four wheels with matching bearing mounts.
- A driver seat for throttle and steering input.
- A gas engine or other current power source connected to the drive axle.
- Bearings on the steering axle connected to the driver seat.
- A Connect Tool to wire the seat, engine, and moving parts.
Add suspension after the basic car drives straight. Add storage, lights, a bed, or a drill only after the frame survives a test route without tipping or losing a wheel.
Choose the right car for your goal
| Car type | Best use | Build priority | Avoid at first |
|---|---|---|---|
| First / basic car | Reaching the Mechanic Station and nearby loot | Light frame, four wheels, simple steering | Heavy armor and decorative mechanisms |
| Survival scout car | Exploring roads and finding points of interest | Fuel range, stable suspension, repair access | A tall body or narrow track |
| Hauler or work truck | Carrying crops, crates, or a trailer | Low centre of mass, strong frame, storage | Racing speed and oversized body panels |
| Drill car | Excavation and breaking terrain | Front clearance, counterweight, protected controls | Mounting a heavy drill too far ahead |
| Piston car | Creative experiments and special movement | A tested piston drivetrain and travel limits | Using it as the first irreplaceable Survival vehicle |
There is no single best Scrap Mechanic car for every world. A basic car is best for the first trip, a stable scout car is best for exploration, and a hauler is best once fuel and cargo become the limiting factors. Treat “best car” search results as a role question: best for travel, hauling, drilling, combat, or building inspiration.
Parts and layout for a first Survival car
Chassis
Build the chassis as a simple rectangle on the Lift. Keep the body low and leave room for the wheels to move without hitting the frame. A short, wide car is easier to control than a tall narrow car, especially before suspension is tuned.
Use cheap blocks for the prototype and replace them later if the vehicle needs more durability. Do not spend rare materials on a body before the steering, engine, and wheel alignment work.
Wheels and bearings
Use four matching wheels for the first test. Put the steering bearings on one axle and the powered bearings on the other. Keep the wheel mount close to the bearing so the bearing is not forced to carry a long lever arm.
Before lowering the car from the Lift, turn the steering and inspect both front wheels. They should point in the same intended direction and have enough clearance from the chassis.
Driver seat and controls
Mount the driver seat where you can reach it without placing the vehicle's centre of mass too high. Connect the seat to the steering bearings and the engine according to the current in-game prompts. Test forward, reverse, left, and right in an open area before driving between trees or buildings.
If the car turns the wrong way, fix the bearing direction or connection before changing the frame. Reversing a single steering connection can make one wheel fight the other and cause the car to drag or flip.
Engine and drive axle
Connect the engine to the powered axle and check that both drive wheels receive the intended input. A car that spins one wheel, refuses to move, or pulls sharply to one side usually has a connection, bearing, or clearance problem before it has an engine-power problem. See the Engine Wiki entry for Gas Engine, Electric Engine, and piston-engine trade-offs.
Start with moderate power. More speed makes a weak chassis, narrow stance, or badly tuned suspension harder to diagnose, and it increases the cost of a crash in Survival.
Step-by-step Scrap Mechanic car tutorial
- Place the Lift on level ground. Keep the first prototype close to your base or Mechanic Station so recovery is cheap.
- Build a flat chassis. Make it wide enough for the wheels and long enough for the seat and engine without stacking the body high.
- Add the rear drive axle. Place the bearings, wheels, and engine connection, then spin the wheels by testing the controls.
- Add the front steering axle. Use matching bearings, check the wheel direction, and leave room for the tires to turn.
- Mount the driver seat. Keep it low and centred. Connect steering and throttle, then test each input separately.
- Lower the car and inspect it. Look for wheel clipping, frame contact, loose connections, and uneven height before driving.
- Run a short test route. Drive straight, brake, turn slowly, reverse, and cross a small bump.
- Add one upgrade at a time. Choose suspension, storage, lights, a bed, or a drill based on the next task rather than adding every feature at once.
This order makes the first car easy to repair. It also gives you a known working baseline when a later suspension, piston, or drill modification introduces a new problem.
Make a stable Scrap Mechanic Survival car
Stability comes from the whole vehicle, not one part. Keep the centre of mass low, make the track wide enough for the body, and avoid putting heavy storage or engines high above the axles. A larger car is not automatically safer: extra blocks add weight, increase stopping distance, and place more load on the bearings and suspension.
Use the Scrap Mechanic suspension guide when the car bottoms out, bounces, folds a wheel, or needs more ground clearance. Start with a simple straight suspension before attempting a wishbone or double wishbone layout. Test the empty car and the loaded car because a vehicle that is stable without cargo can tip after adding crates, crops, or a trailer.
For a Survival scout car, prioritize:
- A low seat and low cargo position.
- Matching left and right wheel and suspension settings.
- Enough fuel for the route and a recovery trip.
- A frame that leaves access to bearings, engine, and connection points.
- A body that does not block the driver's view or wheel travel.
Drill car: when and how to add a drill
A Scrap Mechanic drill car is useful when the next task is excavation or breaking through terrain, but a front-mounted drill changes the vehicle's balance. Add the drill after the basic car passes a test route. Mount it close to the front structure, protect the connection point, and add a counterweight only as needed.
Keep the drill low enough to contact the target without forcing the front suspension to the limit. Leave room to turn and reverse; a drill that reaches too far forward can make the car nose-heavy and difficult to recover. Test the drill without a full cargo load, then test again with the materials you expect to carry.
Do not combine a drill, heavy armor, a tall cabin, and an untested suspension on the same first prototype. Build a small drill attachment that can be removed when the car returns to normal exploration duty.
Piston car: advanced design, not a first car
Piston car searches usually come from players looking for unusual movement, automatic mechanisms, or a creative challenge. A piston car can be fun, but it adds timing, travel limits, collisions, and extra moving parts to a system that already has wheels and steering.
Use a piston car in Creative or on a duplicate Survival creation first. Check that the piston cannot overextend into the chassis, that the moving section has a hard travel limit, and that the drivetrain still works when the vehicle turns or reverses. If the goal is simply to travel farther, a conventional engine and stable suspension will usually be easier to maintain.
Fix common Scrap Mechanic car problems
| Problem | Check first | Practical fix |
|---|---|---|
| Car does not move | Engine connection, fuel, powered bearing, and wheel contact | Test the engine and drive axle separately, then reconnect the seat and engine |
| Car turns the wrong way | Bearing direction or crossed steering connection | Correct the steering bearing orientation and test one axle at a time |
| Car flips in a turn | High centre of mass, narrow track, speed, or soft suspension | Lower the body, widen the stance, slow steering, and tune suspension |
| One wheel drags | Unequal wheel direction, frame collision, or mismatched suspension | Raise the car on the Lift and compare both sides before changing power |
| Wheels fold under the car | Long bearing leverage or insufficient clearance | Shorten the wheel mount and check full steering and suspension travel |
| Drill car tips forward | Drill too far from the front axle or excessive front weight | Move the drill inward, lower the cargo, or add a small removable counterweight |
| Piston car shakes or stalls | Travel limit, timing, collision, or too many moving parts | Test one piston module on the Lift and simplify the mechanism |
| Car becomes laggy | Too many bearings, controllers, pistons, or decorative movers | Remove nonessential moving parts and test the basic drivetrain again |
Use the Lift as a diagnostic tool. Freeze the car, inspect the underside, and test one subsystem at a time. Rebuilding the entire car before locating the failed connection makes a simple wiring or collision problem much harder to find.
Scrap Mechanic car designs and upgrade path
Start with a basic car design, then turn it into the role you actually need:
- First car: four wheels, seat, engine, and simple frame.
- Scout car: add reliable suspension, lights, fuel access, and a small storage area.
- Hauler: strengthen the frame, lower the cargo, and test the loaded weight before adding a trailer.
- Drill car: add a removable front drill and protect the connection point.
- Advanced design: experiment with a double wishbone suspension, piston system, or Creative-only mechanism on a copy.
This progression produces better Scrap Mechanic car designs than starting with a giant body and trying to hide an untested drivetrain inside it. Keep a working version before each major upgrade so a failed experiment does not remove your only transport option.
Scrap Mechanic car FAQ
What is the best first car in Scrap Mechanic Survival?
A small, low, four-wheel car with simple steering and a reliable engine is the best first Survival car. It costs less to repair, is easier to recover, and gives you a baseline for later suspension or cargo upgrades.
How do I build a basic car in Scrap Mechanic?
Use a Lift, build a flat chassis, attach four wheels through bearings, add a driver seat and engine, connect the controls, and test the car before adding bodywork. Keep the first build light and wide.
Should I use suspension on my first car?
Add suspension after the basic drivetrain works. Suspension improves comfort and ground clearance, but it also adds another system to tune. Use the dedicated suspension guide for stiffness, wheel travel, and glitch troubleshooting.
Is a piston car good for Survival?
It can work, but a piston car is usually an advanced project. Test it in Creative or on a duplicate Survival creation first because piston timing, collisions, and extra moving parts can make the vehicle unreliable.
How do I make a drill car stable?
Keep the drill close to the front structure, limit its travel, keep the rest of the vehicle low, and test with the real cargo weight. A removable drill attachment is easier to repair than a permanently overloaded front end.
Why is my Scrap Mechanic car so slow?
Check weight, wheel contact, engine connections, suspension compression, and whether the drivetrain is fighting a steering or bearing problem. Reduce heavy decorative blocks before adding more engine power.
Sources and review status
This guide combines the official game context with community Survival builds and current beginner/tutorial search patterns. Exact blueprints, part costs, physics behaviour, and piston timing can change with the game version, so treat this as a reliable build process rather than a promise that one car design works in every world. Recheck the page after vehicle, physics, or multiplayer updates.